- Power on the computer and the camera. The camera power switch is on the top left side of the camera.
- Make sure the twist knob next to the power switch is set to 'M'

- Next, start up Dragonframe.
- Dragonframe 4 should be on the Dock. If not, it can be found in the applications folder, in the Dragonframe 4 folder.
- A window will appear asking you to Create New Scene, Open Scene, or Open Recent. Click Create New Scene.
- If you have not started a scene, select Creat New Scene.
- If you have an existing scene, select Open Scene. Navigate to the location of your file, and select the .dgn file to open it.
- If you are creating a new scene, you will need to enter a name for your file under the Production box. Leave Scene and Take at 001. Select the desired framerate (12 or 24)
- Click OK
- A new window will open asking you where to save your animation. Select a place on either Desktop or your own storage device, name your project, and click Save.
- The sidelights on the copy stand can be turned on by flipping the power switches on the tops of each light.
- The main Dragonframe interface will appear, including a window with a preview of what the camera sees.
- Click Capture>Video Source>Canon EOS DIGITAL REBEL XS and Capture Source>Canon EOS DIGITAL REBEL XS.
- If it does not appear in either of the lists confirm that the camera is powered on. Make sure the USB cable is securely connected from the camera to the computer.
- If at all you don't see Canon EOS DIGITAL REBEL XS in either option click Capture again and select Reset/Refresh Connections.
- If that does not work power everything down and start again. Seek assistance from the Media Technology Specialist.
- Make sure the preview is set to 16:9 in the Compostion Guide on the right bottom of Dragonframe 4.
If you are unable to find it, ensure the Aspect Ratio Mask menu is enabled in the top right corner of Dragonframe
- You can adjust the cameras zoom and focus by turning the different ring sections on the lens.
- First, frame your work with the zoom ring. The zoom ring is the larger ring with rubber grip around it. Turn it to the left to zoom out and the right to zoom in.
- Now focus your image by turning the focus ring at the bottom of the lens.
- Adjust the Shutter Speed, Aperture, ISO, and other camera settings in Dragonframe.
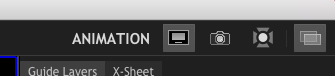
- In the Dragonframe window click the Cinematography tab in the top right hand corner.

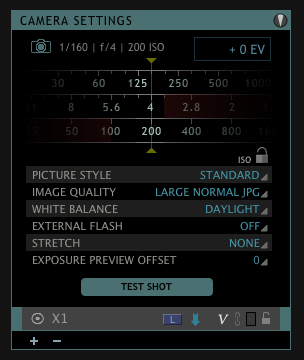
- A new side bar will appear with camera settings in the bottom right hand corner.
- Using the mouse click and drag the first number line left or right to adjust the Shutter Speed. A suggested range would be 1/250 - 1/1000.
- Do the same to the second number line to adjust the Aperture. A suggested range would be 4-5.6
- Do the same to the third number line to adjust the ISO. A suggested range would be 100 - 400.
- Next to Picture Settings, click and select Standard from the drop down menu.
- Next to Image Quality, click and select Small Fine JPG from the drop down menu.
- Next to White Balance, click and select AUTO from the drop down menu.
- External Flash should be set to OFF and Exposure Preview Offset at 0.
- Click the Animation Canvas next to the camera at the top right hand corner of the Dragonframe window.
- Under the preview window, select your frame rate from the drop down menu.
- Move the red ball slider slightly to the right to give your self more onion-skin opacity so you can see your previous frame.
- After all of the settings are established, you can start capturing frames.
- Place your object or paper on the table. Use registration bars when necessary.
- To capture a single frame, press either the return/enter key.
- To capture multiple frames either press Command and 2 for 2 frames, or Command and 3 for 3 frames.
- The other option for capturing multiple frames is to click Capture >Shoot Multiple Frames. A new window will open up. Enter the amount of frames you want to shoot each time you press enter.
- You can playback the captured frames by simply hitting the spacebar.
- When you capture frames in Dragonframe, you are saving individual frames to a file. They need to be converted into a .mp4.
- To export to a .mp4, click File >Export Movie.
- Your settings should look like this with your Frame Rate matching yours set earlier:

- Click Export.
- When finished, turn off the lights and camera.
How do I use Dragonframe with the Animation Copy Stands
KB Footer
Can't find what you need? Let us know how we can help!