Preparing a File for Rendering
- Ensure your file has been properly set. If not, set the project folder up. Open the Maya file that will be rendered. Ensure there are no errors that prevent the file from loading properly.
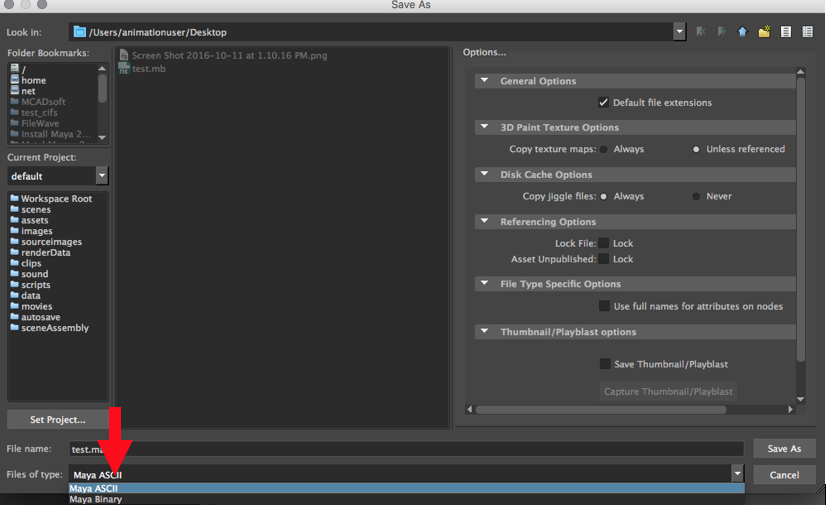
- Use Save As to create a new version of that file that will be used exclusively for rendering on the Render Farm. Save this file as a Maya Ascii.
- In this file, change all referenced items to imports through the following method:
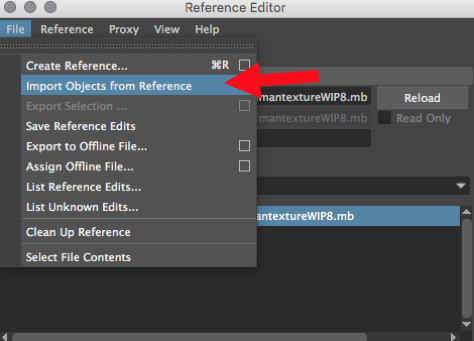
- Open the Reference Editor by clicking on File -> Reference Editor.
- Select the first item on the list of references.
- In the Reference Editor window, select File -> Import Object From Reference.
- If a window appears asking about Namespaces, select Delete Namespaces.
- Repeat for each item until the list is empty, close the reference editor, and save the file.
- Note: Importing references can speed up a render and lower ram usage significantly, but it may also cause shaders to break or create other errors. If such errors occur, and re-assigning shaders results in an "error parsing arguments" message, a file containing references may be used as a last resort.
- Make sure all textures are correctly linked to their corresponding shaders. To do this quickly while Maya is open, go to Window-> General Editors -> File Path Editor, and make sure all textures show up correctly.
- If no textures appear, make sure your project is set. Go to File -> Set Project, and select the project folder. Re-open the Maya file.
- If one or a few textures do not appear, correct the file path for those textures in the attribute editor.
- To correct file, select the folder icon next to Image Name.
- Navigate to correct folder, select file, and select Open.
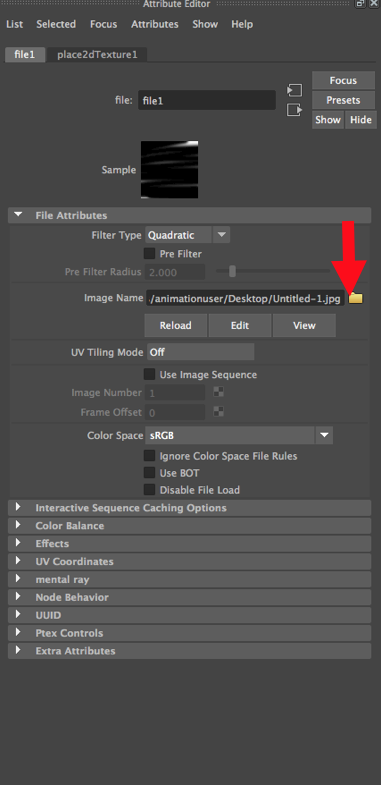
- Save the file.
- If using fur, make sure that any length/direction/baldness maps are linked correctly by checking the file paths in the Attribute Editor.
- Play through the animation at real-time. Make sure there are no uncached simulations, and all caches are being found. All simulations must be cached or the file will not render correctly.
- If no caches are found, make sure your project is set. Go to File -> Set Project, and select the project folder. Re-open the Maya file.
- If one or a few caches are not found, correct the file path for those caches in the Attribute Editor.
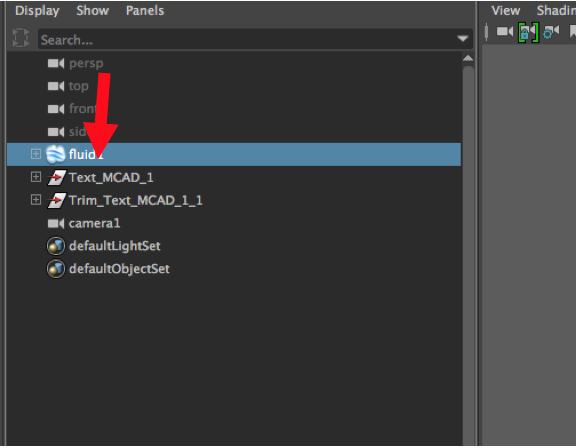
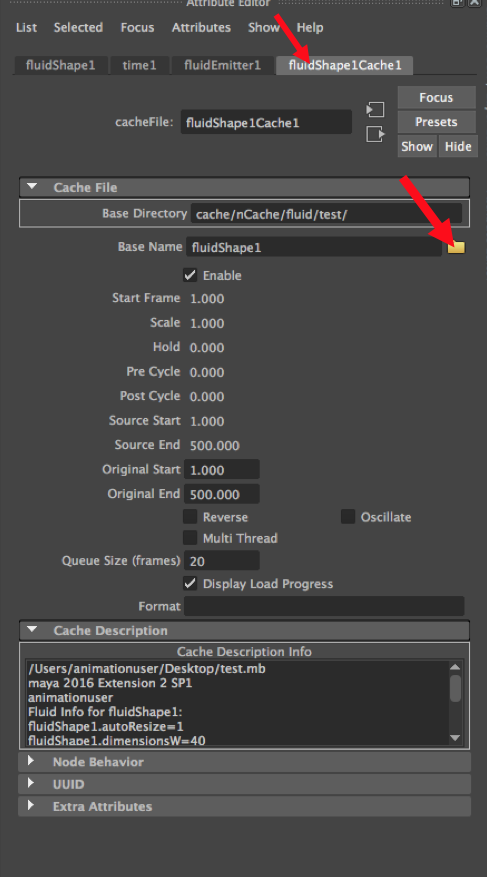
- Select the simulation from Outliner Panel, navigate to the Cache tab in the Attribute Editor.
- Ensure the file path is correct in the Base Directory
- If it is not the correct file, select the folder next to the Base Name, navigate to correct file and select open.
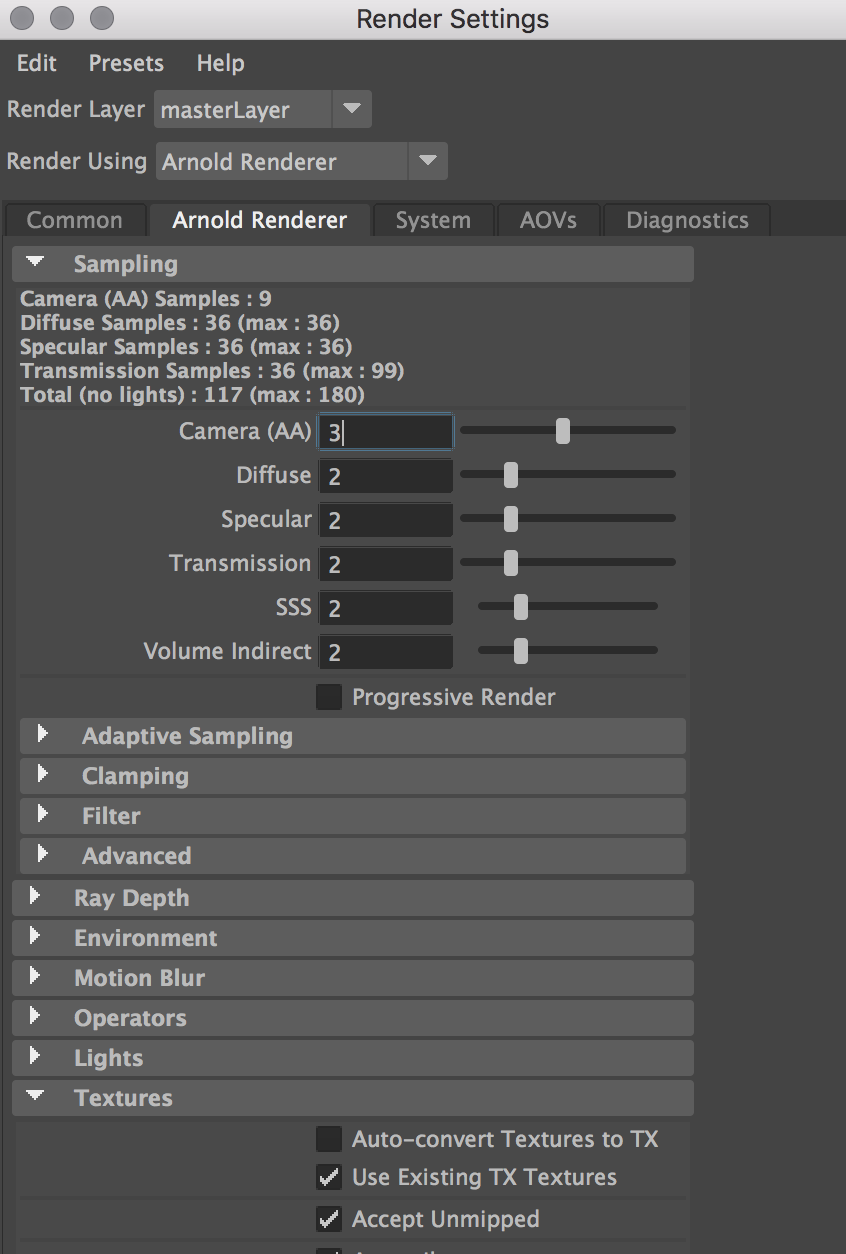
- Open the Render Settings window and make sure all options are set correctly.
- If not done already, take note of the frame range of the animation. This will need to be typed into Smedge later on.
- Test render one frame of the animation. Make sure the frame looks appropriate, and fix any issues that arise.
- Save the file and close Maya.
- If the file is not already being kept in the Animation Server, which the render farm can access, drag the project folder onto Animation server, and fix all the filepaths inside Maya.
Using Smedge to Send a Job to the Render Farm
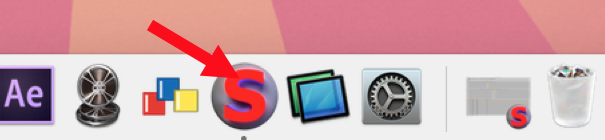
- Open Smedge on the Render Farm Computer in the Animation Studio if it is not already open. To do so, click on the "S"icon in the dock.
- If Smedge opens in Engine mode, you will need to go to System -> Connect.
- In the menu bar, select New Job. The New Job window will open.

- New Job Settings are as follows:
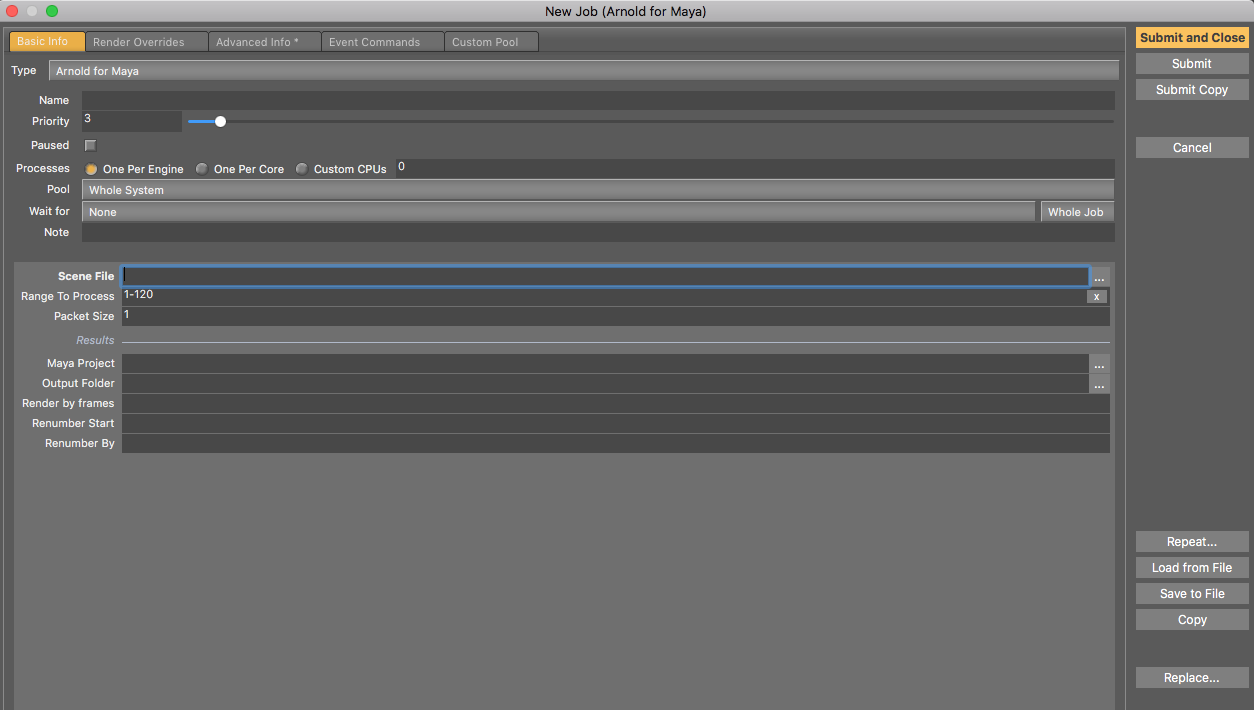
- Select Submit and Close to send the job to the MCAD Render Farm. The nodes listed in the bottom panel of the Smedge window will turn green to show that they are currently enabled and rendering a frame.
- Jobs are listed in the middle pane of the Smedge window. Select a job to view active work and completed frames. In the right pane of the Smedge window, select the History tab to view all in progress/failed/completed frames in that job. Select the Active Work tab to view what frames are currently being rendered.
- Once a jobs status is Completed, the frames can be dragged from the project's images folder to a portable hard drive.
If ANY issues occurs, please contact Aaron Loeks (aloeks@mcad.edu) during regular business hours (Mon-Fri 9AM-5PM) for assistance. Be advised that emails may not be replied to outside of regular business hours.