Connecting Your Windows Computer to the MCAD Wireless Network
See also: Wireless for MacOS, Wireless for iOS, and Wireless for Android
This article gives a detailed walkthrough of the steps necessary to connect to the MCAD wireless network from a Windows computer, including screenshots. Due to MCAD's network security requirements, this process involves some extra configuration. In rare cases, some Windows devices may be unable to connect at all. For assistance, please contact helpdesk@mcad.edu or stop by the Help Desk in person with your device.
Before starting the proces please make sure to save all your work and exit all applications you are running.
1. Download and install the PEAP-GTC plugin. Click the link on the left to download a .zip containing the client. When it has finished downloading, unzip the files. Before running the installer:
- Right click on the unzipped installer application, select Properties
- Go to the Compatibility tab, enable compatibility for Windows 7
- Click OK to close the Properties window.
At this point you can run the installer and proceed through it.
2. After installing the plugin, you’ll be prompted to restart your computer. Save any open work, and restart your machine before attempting the rest of the steps below. If you do not restart you will not be able to connect to the MCAD network.
3. After you’ve restarted go to Network and Sharing Center. There are a few ways to get here depending on your version of Windows:
- You can get here by clicking the WiFi icon in the lower right corner (aka, the System Tray), clicking Network & Internet settings if you see the option, and finding a link to Network and Sharing Center in the window that opens.
- You can type Network and Sharing Center into your search bar and selecting the option if it shows up.
- You can go the Start menu and search for or find the Control Panel (the old-style one from earlier Windows eras), then switch to Big or Small Icons (setting in the upper right of the Control Panel), and then select Network and Sharing Center in this list.
4. In Network and Sharing Center, click “Set up a new connection or network,” and click Next.

Then select “Manually connect to a wireless network”

5. In the “Network name” field, type “MCAD.” In the “Security type” field, select “WPA2-Enterprise.” Do NOT change any other fields, and click Next.
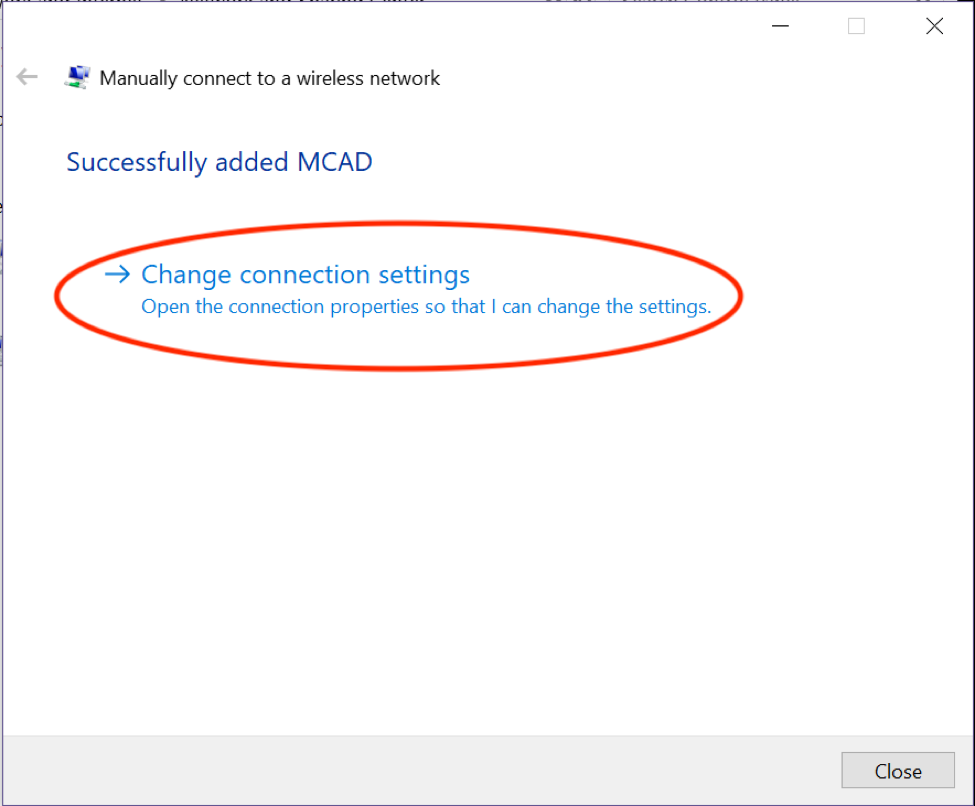
6. On the next screen, click “Change connection settings.” Go to the “Security” tab of the window that opens.
7. Click the “Settings” button to the right of the field that says “Microsoft: Protected EAP (PEAP)” by default. 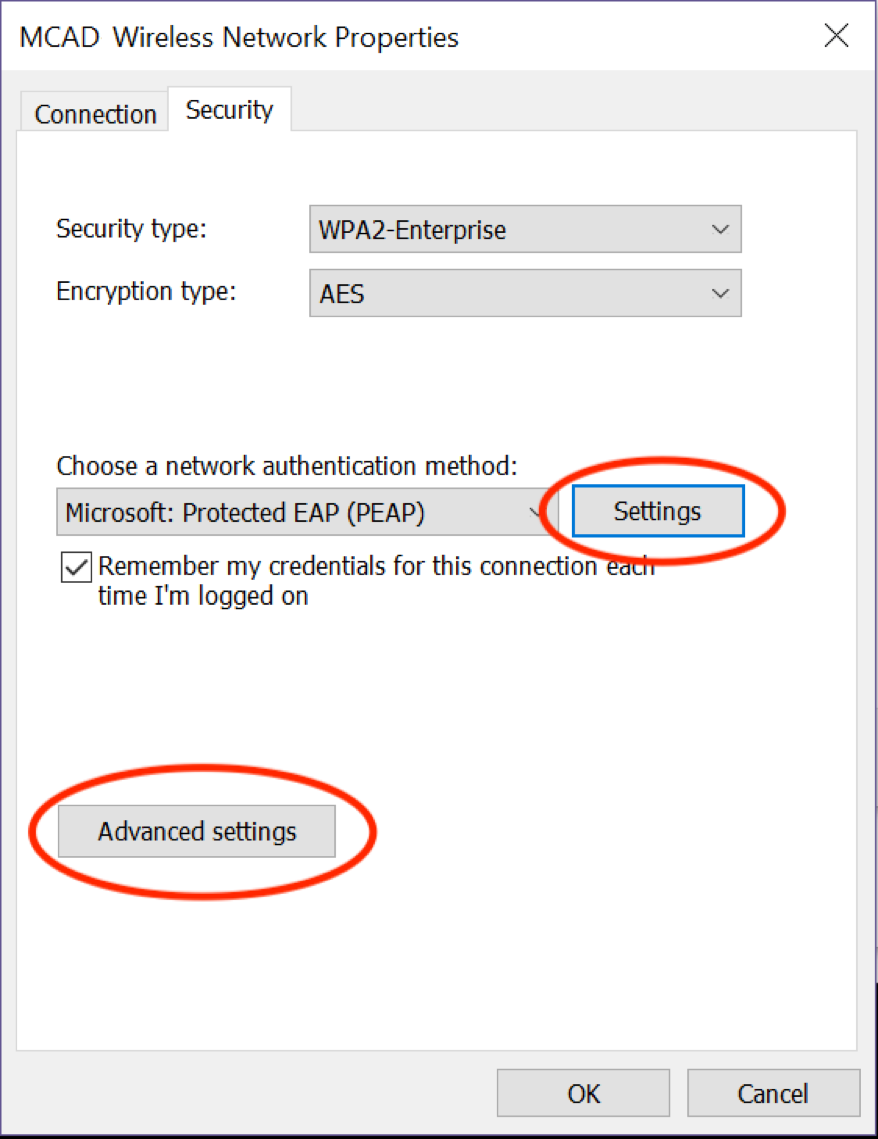
In the window that opens, uncheck the box that says “Verify the server’s identity by validating the certificate” near the top. In the dropdown field near the bottom labelled “Select Authentication Method,” select “EAP-Token.” Click OK. Multiple “Enter Credentials” windows may pop up. Ignore and press cancel on all of them.

8. Back in the “Security” tab of previous window, click the “Advanced Settings” button. Check the box that says “Specify authentication mode” and select “User authentication” in the dropdown field. Click OK.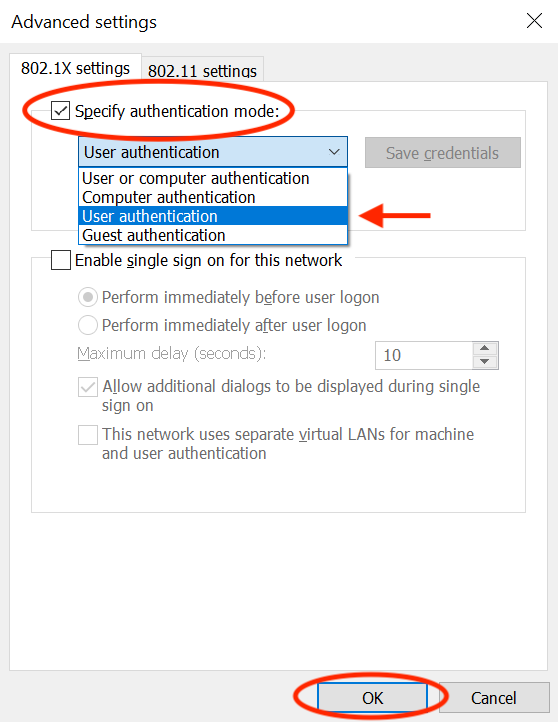
9. Press OK again, then close the remaining window. You should now see a small window that say “Enter Credentials.” Type in your MCAD username and password (first initial last name, not your full email address). Leave the “Logon domain” field blank and press ok. (If this window doesn’t pop up automatically, click the WiFi icon in the lower right corner and select the MCAD network, then click connect.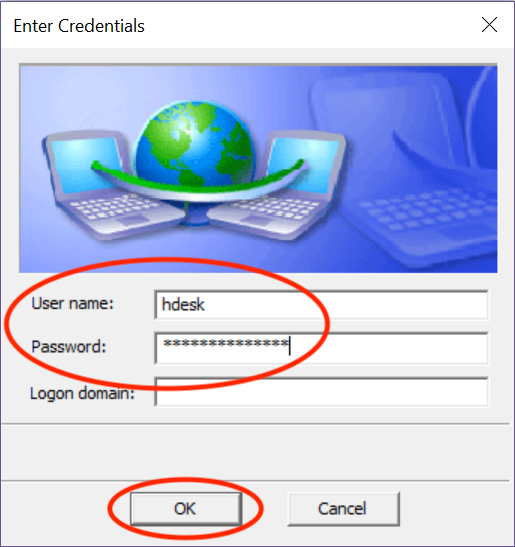
After you have followed all of these steps, try to load a webpage. If you are still unable to connect, contact the Help Desk at helpdesk@mcad.edu or at 612-874-3666.